Chris Hobson
Well-Known Member
- Relationship to Diabetes
- Type 2
Being a retired person, I've been planning doing some kind of woodwork project for a while. My workshop was in a bit of a state so that has been a starting point. So, I've got rid of a lot of junk and sorted out which bits of wood might be useful and taken the rest to the tip. Repaired a broken shelving unit, fitted a new router to the router table and made some new drawers to keep all of the bits and accessories in. Lastly I've installed much better lighting. Equipment wise I have a table saw, mitre saw, router table, band saw, two drill presses, two bench grinders, thickness planer and a variety of hand held power tools.
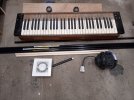
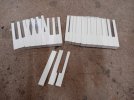
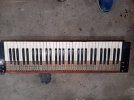
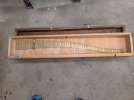
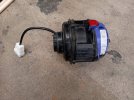
I have in my possession the insides of an old pedal operated reed organ. The bellows are totally shot, the keys are rather brown and chipped and quite a few of them stick. However, some time ago as an experiment, I bought two very cheap hair dryers, took out the heating elements and mounted them to the wind chest to provide some wind and managed to get a tune out of it. So my project is to design and build a case to contain the keyboard, the reed section, and a rank of stopped flutes. The flutes will be made from black plastic conduit. There will also be a tremolo unit. There are 61 keys so I will probably build several jigs so that the flutes can be sort of mass produced. I currently have one flute that I made as an experiment just to make sure that I could make one that actually produces a sound. The wind chests and the case will be made from plywood. I'm intending to use softwood for the internal construction and oak for the parts that are visible. The wind will be provided by an extractor fan, mounted so that it's blowing inwards obviously. I have already bought the new key tops, I suspect that removing the old ones will be the hard part of installing them. Hopefully I will be able to provide updates as work progresses possibly with photographs.
I have in my possession the insides of an old pedal operated reed organ. The bellows are totally shot, the keys are rather brown and chipped and quite a few of them stick. However, some time ago as an experiment, I bought two very cheap hair dryers, took out the heating elements and mounted them to the wind chest to provide some wind and managed to get a tune out of it. So my project is to design and build a case to contain the keyboard, the reed section, and a rank of stopped flutes. The flutes will be made from black plastic conduit. There will also be a tremolo unit. There are 61 keys so I will probably build several jigs so that the flutes can be sort of mass produced. I currently have one flute that I made as an experiment just to make sure that I could make one that actually produces a sound. The wind chests and the case will be made from plywood. I'm intending to use softwood for the internal construction and oak for the parts that are visible. The wind will be provided by an extractor fan, mounted so that it's blowing inwards obviously. I have already bought the new key tops, I suspect that removing the old ones will be the hard part of installing them. Hopefully I will be able to provide updates as work progresses possibly with photographs.
Last edited:

